To install Moov8 Model M1 accessories such as fenders and the rear carrier, follow these steps:
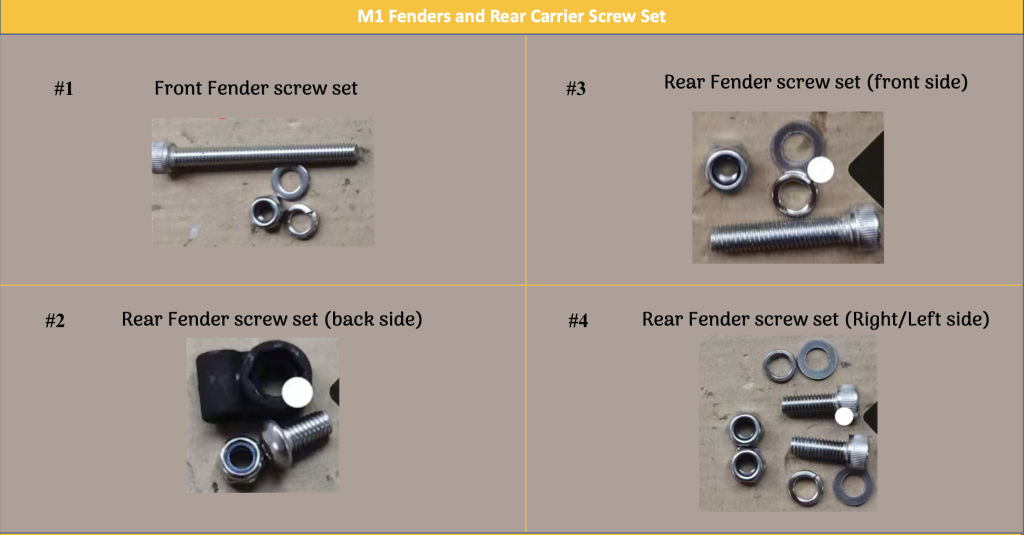
1. Organize the Required Nuts and Bolts: Start by identifying the nuts and bolts required for the different parts, and sort them out. Refer to the images that depict the screw sets that correspond to different parts.

2. Front Fender Installation: Begin by installing the front fender. Use the appropriate nuts and bolts to secure it in place. Ensure it is properly aligned and securely fastened.
3. Rear Fender Installation: Next, proceed with the installation of the rear fender. Utilize the specified nuts and bolts for this part. Make sure it is correctly positioned and firmly attached.
4. Rear Carrier Installation: Finally, install the rear carrier using the designated nuts and bolts. Position it as intended and fasten it securely.
For visual guidance and additional assistance, please watch our detailed installation video linked below:
This video will provide step-by-step instructions to help you correctly install your Model M1 accessories.
(Note: Ensure the screw sets match the specific accessories you have, and confirm the fitment of each part to avoid compatibility issues.)
